Import sizes
Through this process, you can either define sizes for articles of the selected catalog or update existing sizes while keeping size indexes as they are.
Notes:
- If the Size Scale option is activated for the catalog, sizes cannot be imported and the Import button is not available.
- You can import sizes for master catalogs and inherited catalogs that have the “Independent Sizes” option activated.
- For inherited catalogs, Sort order and UPC are copied from the master catalog instead of being imported.
- You can import sizes for inactive articles.
- The system creates a change request for each size imported for a locked article.
- If the “External Change Management” flag is activated and at least one article is locked, you cannot import sizes and the following message appears when you click the Import button:
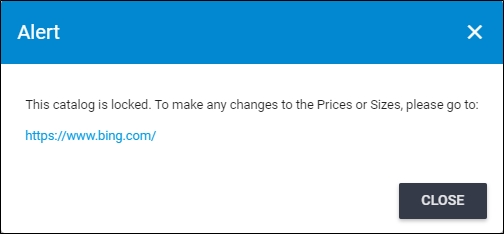
This flag and the link in the message are all managed by the Trasix
Support team.
To import a file with article sizes, make sure to have the articles listed in an Excel sheet with the following columns: Article number, Size, Size index, UPC (optional), and Sort order as shown in the below example:
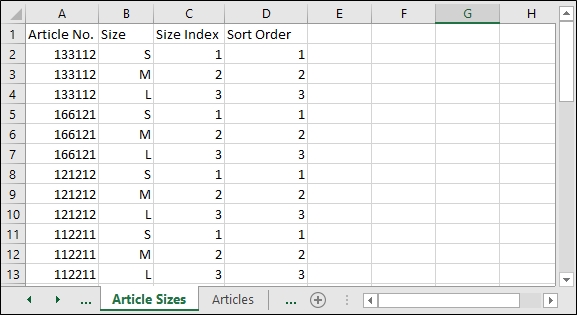
As mentioned before, sizes and size indexes should be unique for each article, so the article number is repeated for each size.
To import a file with sizes, follow these steps:
- Click the Import button, the following window appears:
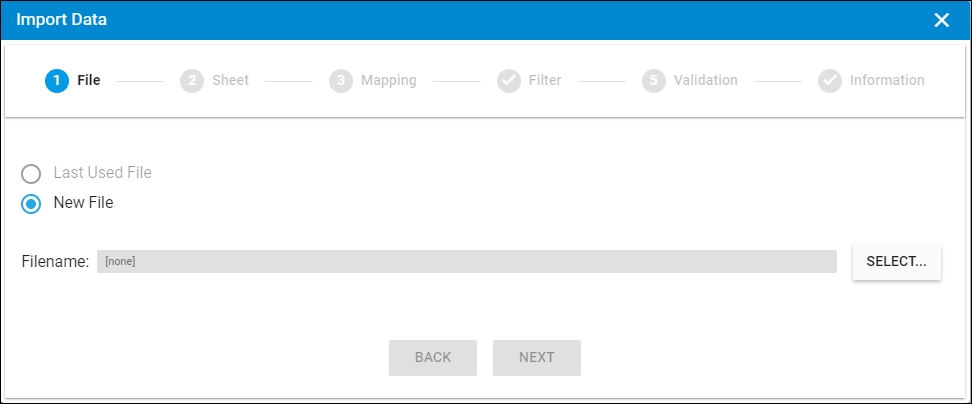
- Click Select to browse for the file you want to import,
- Select the file then click Open, the name of the file you selected appears in its field,
- Click Next, the following window appears:
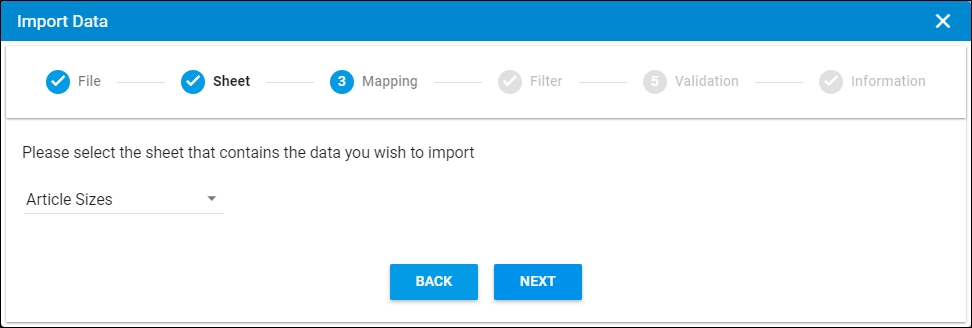
You can click Back to return to the previous window.
- Select the sheet you want from the dropdown list in case your Excel file contains more than one sheet,
- Click Next, the following window appears:
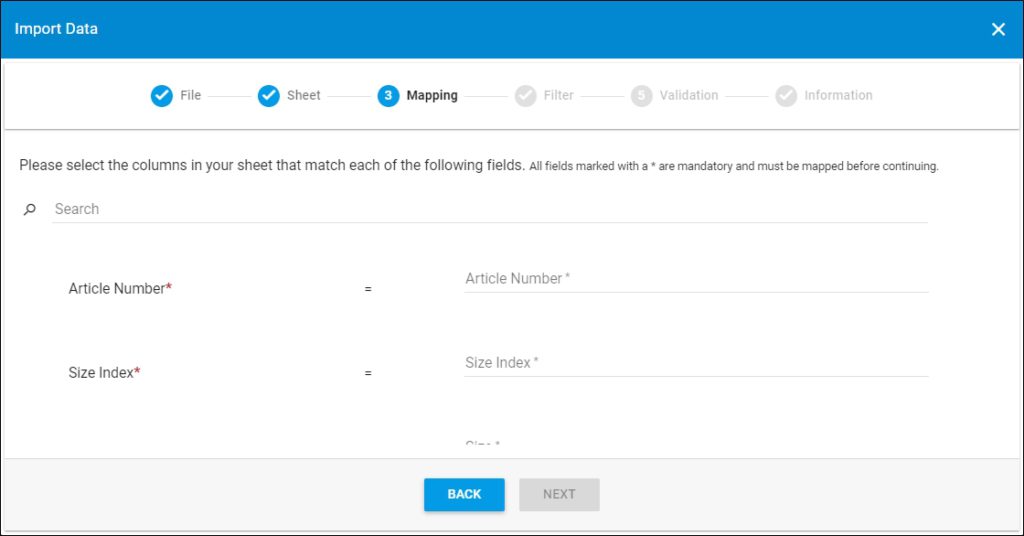
- Select the column of the sheet that matches each field, you can search for the field you want using the search field, then click Next, the following window appears:
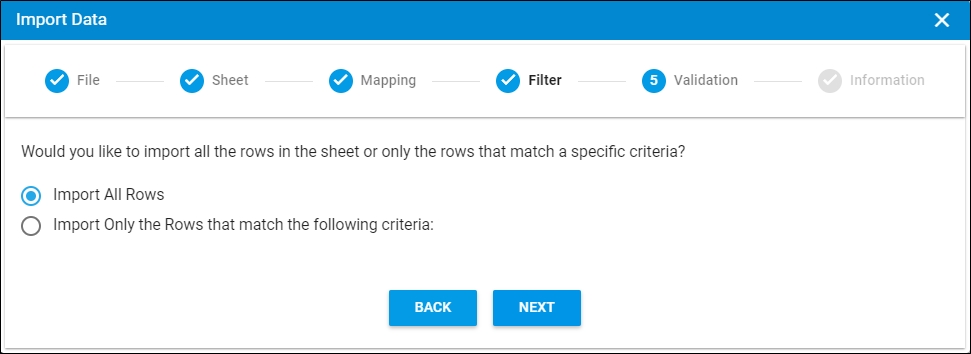
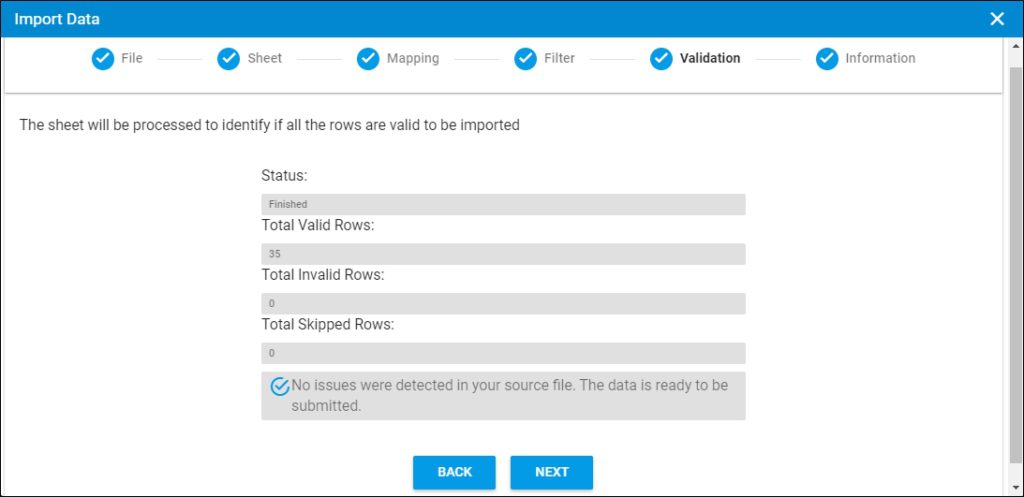
- Click the radio button next to the import method, either all rows or rows that match certain criteria, a validation window appears informing you if records are valid or not, if not, you need to fix the sheet then import the file again,
- Click Next, the following window appears:
- Click Next, the following window appears:
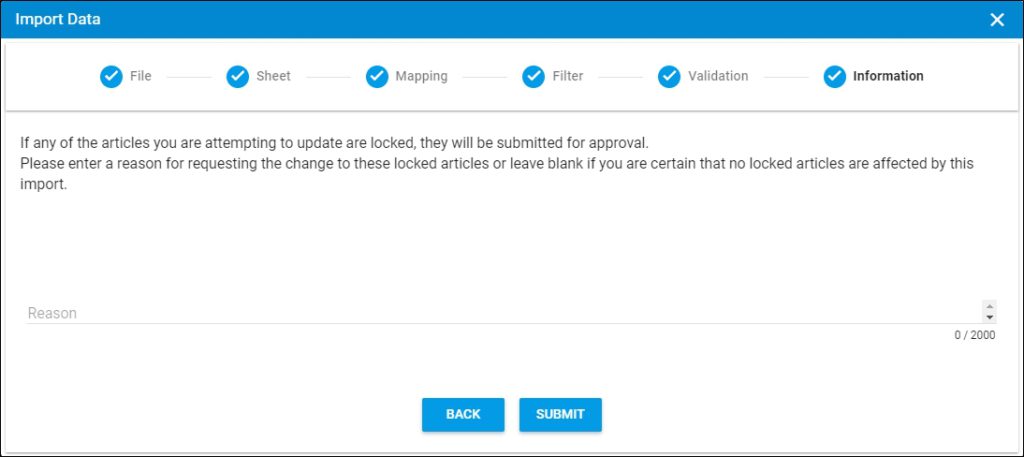
- Enter the reason for the size change, if you want,
- Click Submit, the progress is displayed,
- Wait until the job is finished, then refresh the page, sizes are imported.
Notes:
- Size changes to locked articles are not reflected directly, and a change request is created. For more information, refer to “Change Management”.
- If changes are not reflected on the page, refresh the browser by pressing F5.
- If any of the records are invalid, you can skip them by clicking the checkbox next to Skip invalid rows as shown in the below example:
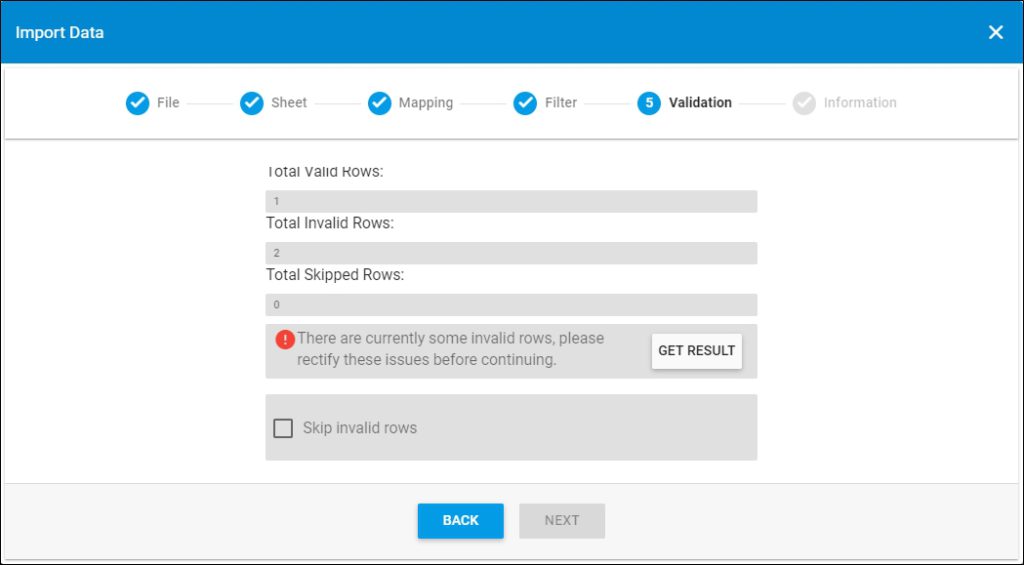
The Next button is activated, and you can import the valid rows.