Saved views
You can group articles into rows and columns based on specific criteria, such as style name, state, or attribute values, etc. These views can then be saved.
To view articles grouped in rows and columns, click ![]() , the following options appear:
, the following options appear:
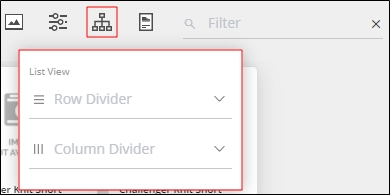
Select the row and column dividers you want as shown in the below example:
You can drag any of the columns to change the width. You can also select all articles within a cell, a row, or a section by clicking the respective checkbox and perform the actions you want on the selected articles.
You can save the preferred view by following these steps:
- Go to the Saved views tab by clicking
 ,
, - Cick the add button, the following window appears:
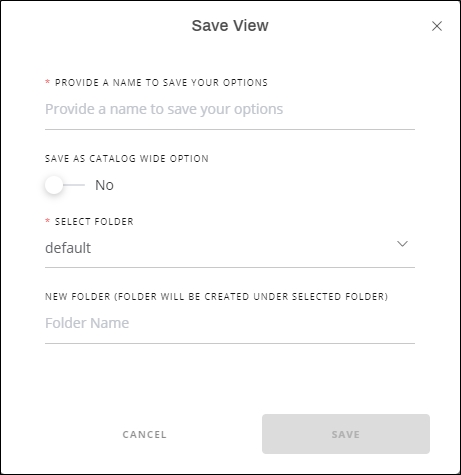
- Enter the view name, and if you are an admin user then you can select whether you want this view to be available for all catalog modules,
- Select the folder to which the view is saved, or enter the new folder name which will be created under the selected folder,
- Click Save.
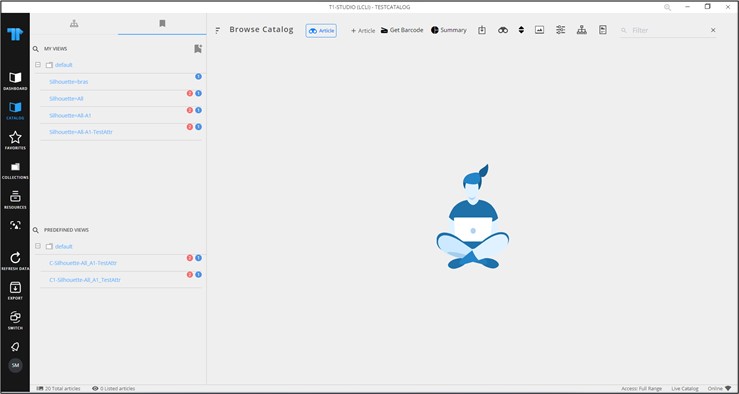
Saved views can be managed through the Saved views tab as shown in the below example:
Your saved views and the catalog level views are listed in a tree structure and you can click any of them to group articles as per the selected view. You can also change the order of views in the folder by dragging and dropping the views in the order you want, as well as the order of folders of saved views.
To delete any of the saved views, hover the mouse over any of the views then click ![]() , the following message appears:
, the following message appears:
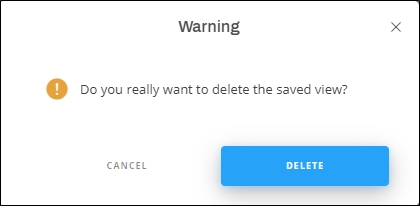
Click Delete to confirm deleting the view.
You can generate slides for the displayed articles by clicking ![]() then selecting the template you want. Follow the steps that are mentioned in the “Merchandising Boards” module for each template.
then selecting the template you want. Follow the steps that are mentioned in the “Merchandising Boards” module for each template.
You can view and add comments to saved views as mentioned in “Saved view comments“.
Notes:
- Notification for changes done to catalog articles and requests are displayed as bubbles as shown in the below example:
The blue bubble shows notifications for request articles while the red bubble shows notifications for catalog articles. When the bubble is clicked, changes are detailed as shown in the below example:
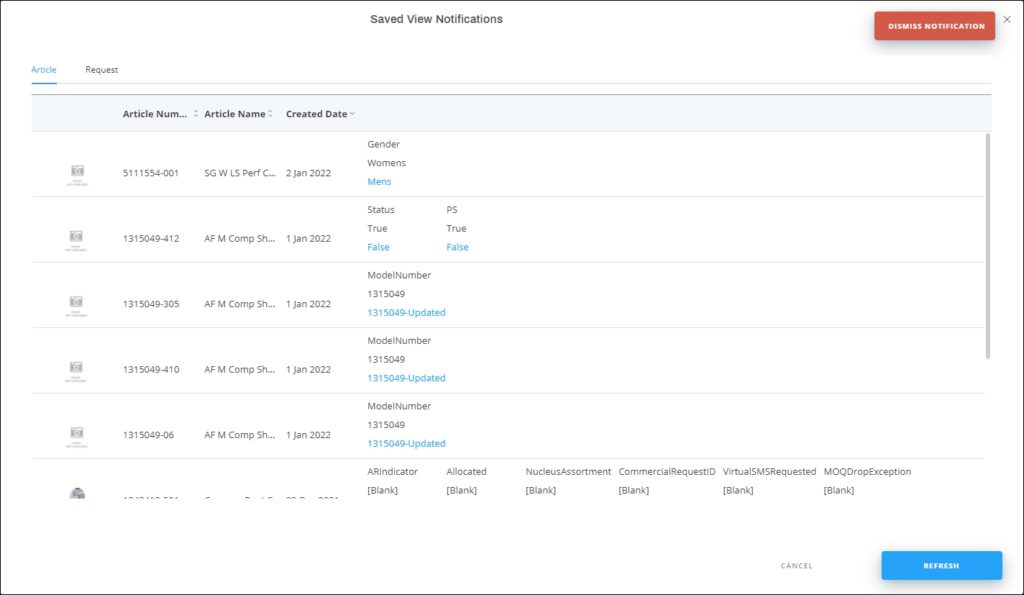
Articles are listed and for each one, the change details are displayed. Logs are generated once a day at a specific time.
- If the catalog is configured to display ordered quantities and approved quantities, those quantities are displayed as shown in the below example:
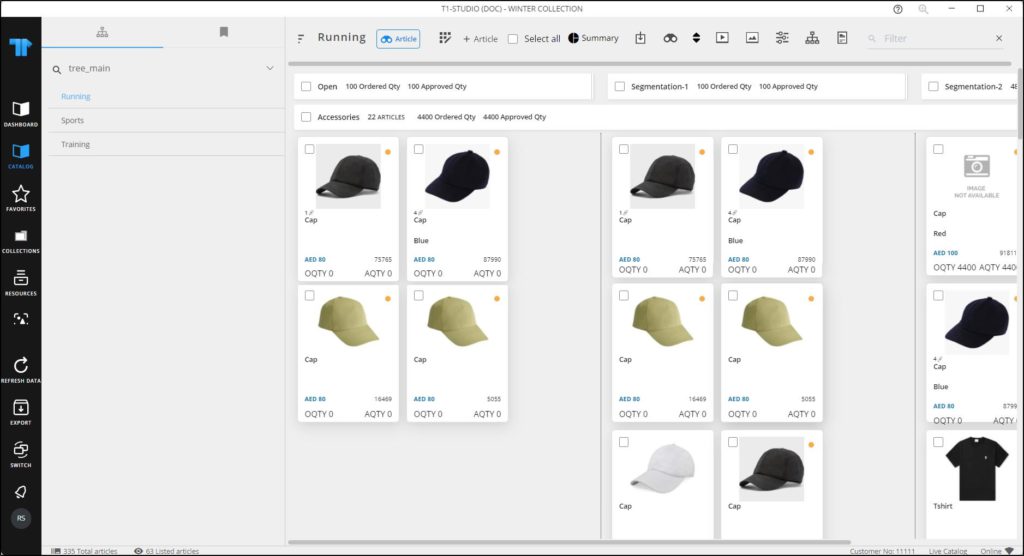
Quantities are also displayed on article or model thumbnail. This information is only displayed if you have the required privilege.