Catalog buckets
You can group the filtered articles by using the “Browse by” attribute option and perform actions on those groups. To do so, click ![]() then select the attribute you want as shown in the below example:
then select the attribute you want as shown in the below example:
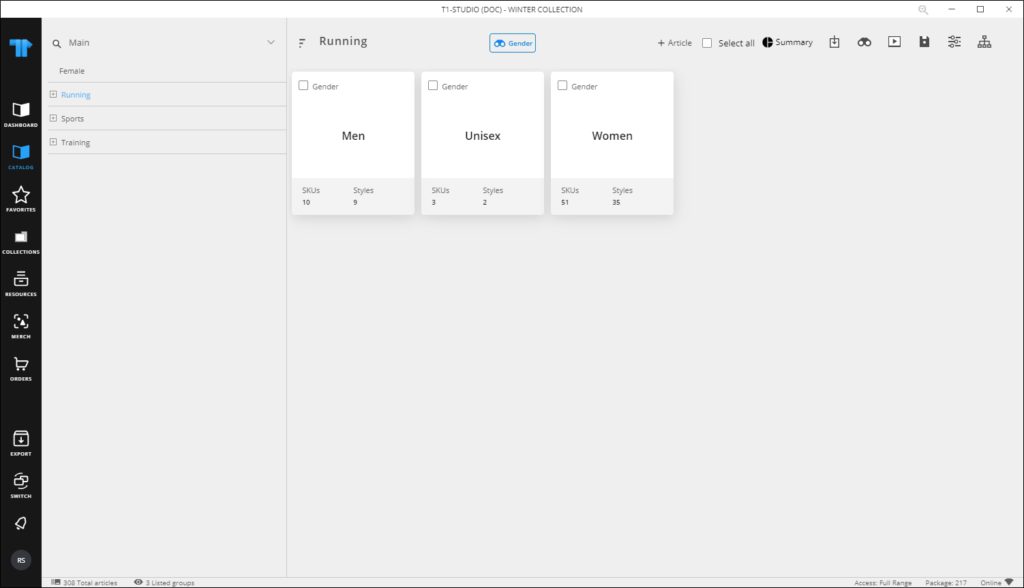
Articles are grouped into buckets. You can select any of the buckets and perform certain actions on all the articles of that bucket. When one bucket or more is selected, the following options appear depending on the catalog configurations:
You can edit segmentations, edit favorites, among other actions. You can generate summary report for articles browsed by attribute by clicking the respective button.
Notes:
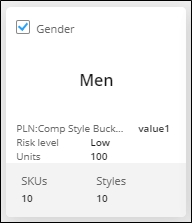
- If the catalog is configured to display an image for the bucket when browsing articles by attribute, the window appears as shown in the blow example:
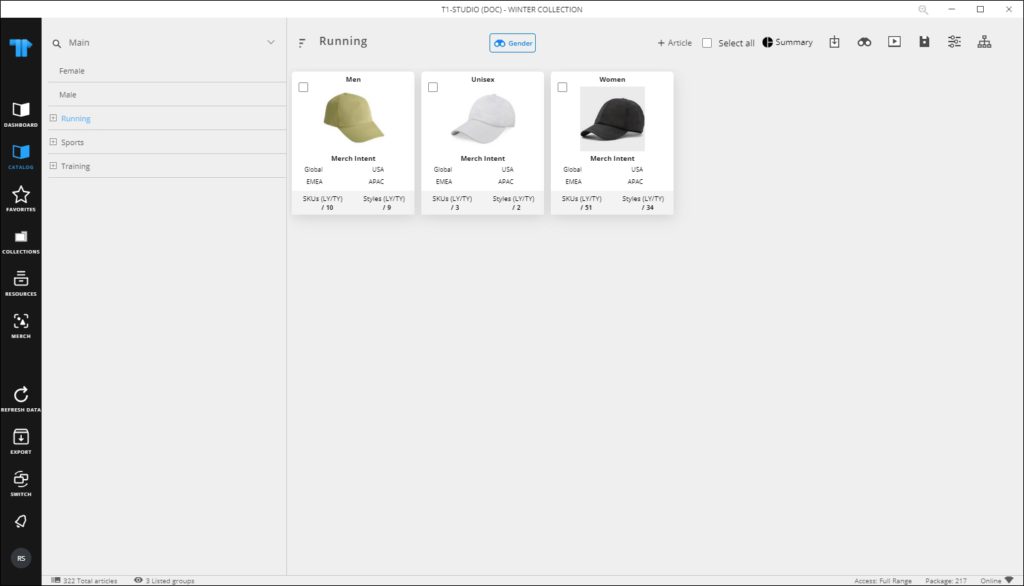
Information displayed on the card can also be configured.
- Bucket background color can be configured based on bucket attribute value.
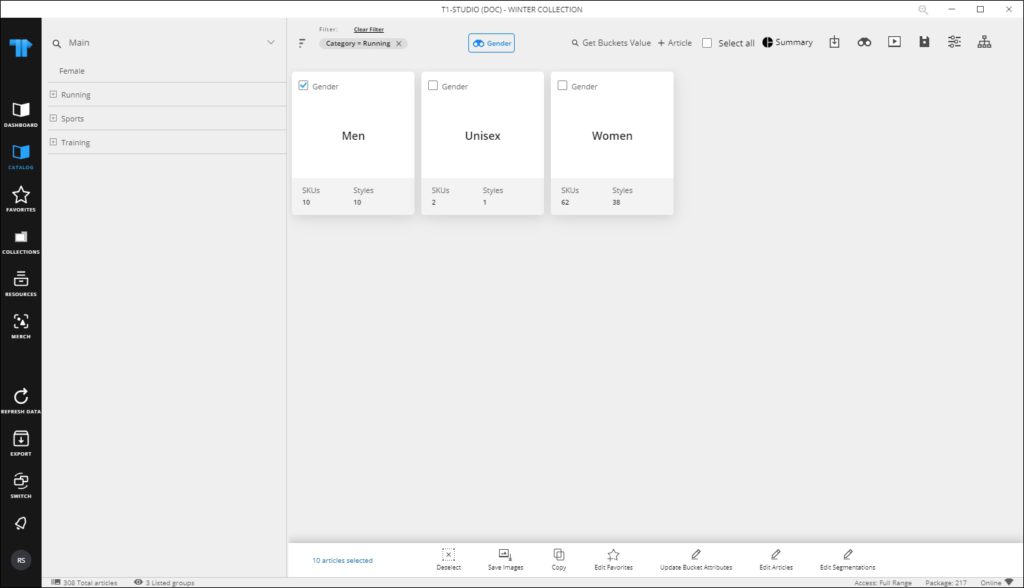
Update bucket attributes
Buckets can have attributes assigned at the catalog level in T1. You can view and update attribute values.
To update the values of the bucket attributes, right click and select “Update Bucket Attributes” from the menu or select the same option from the bottom of the window, the following window appears depending on the catalog configuration:
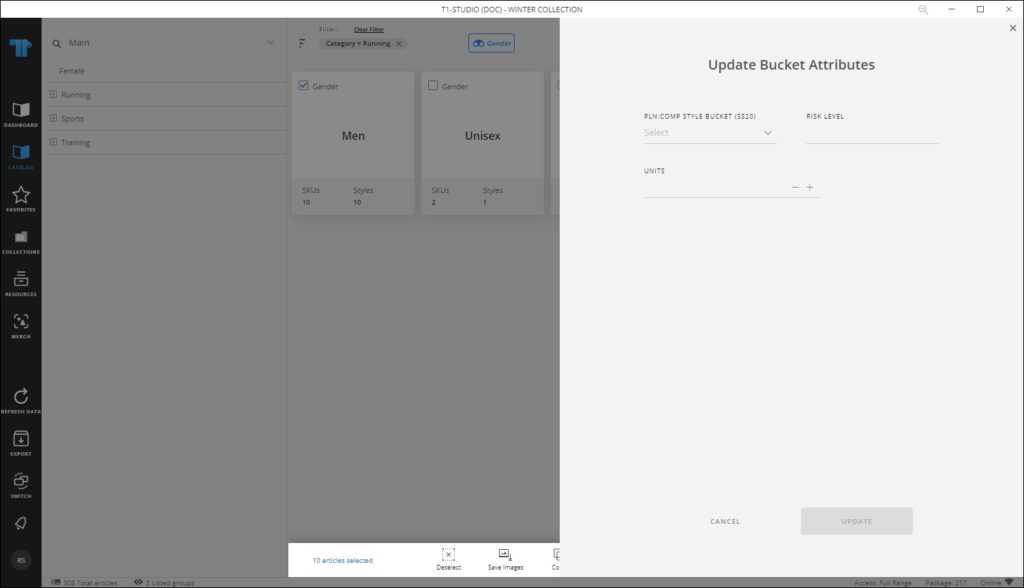
Enter the values you want then click Update. You can view the attribute values by clicking Get Buckets Value, attribute values are displayed on the thumbnail as shown in the below example:
Notes:
- Bulk actions are only available for Live catalogs.
- Updating bucket attributes option is only available for filtered articles.
Generate slides
You can generate slides that contain those buckets and select whether to include the bucket level attributes. To do so, follow these steps:
- Browse the catalog by attribute,
- Click the Generate button, the following window appears, and the are redirected to the Merch Board module:
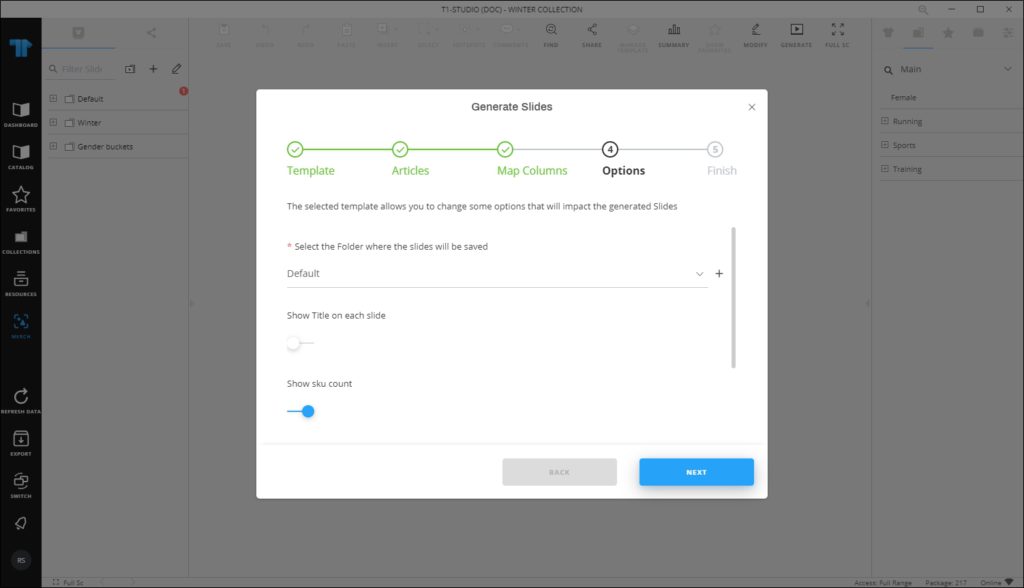
- Select the folder in which you want to save the slides,
- Select whether you want the title on every slide by clicking the slider button,
- Click the slider button if you want to show the SKU count on slides,
- Click the slider button if you want to show the style count on slides,
- Click the slider button if you want to you want to fit the articles in one slide,
- Select the bucket attributes if you want to show them on slides and if values are set for those attributes,
- Click Next, the following window appears:
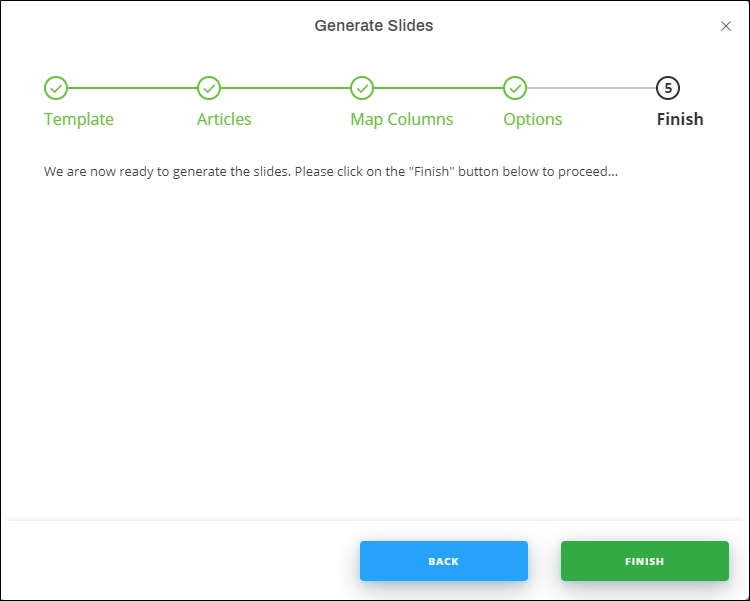
- Click Finish, slides are generated as shown in the below example:

By default, those buckets are fitted in one page. If the user selects the row and column dividers, then the slide will contain a maximum of 7 rows and 6 columns and the remaining buckets will continue to the next page(s).